I'm not the happy camper I was the last time I checked in about the AeroGarden.
I wish I had a better camera so I could show you the white fuzz that is growing at the base of the plants. It's like a mold or mildew. What I gathered from all the different forums and blogs I've visited in an effort to thwart this ugly and damaging growth, is that I lack air flow. The sponges are too wet. TOO WET?? They are supposed to be wet. Water drips through them continuously. Water is supposed to drip through them continuously for 14 to 16 hours a day. Maybe I'm just thick, but I don't get it. Either it's supposed to be wet or it's not supposed to be wet.
So, this is what my gorgeous purple basil looks like today, that is if you can see what's left of it in the bottom left hand corner...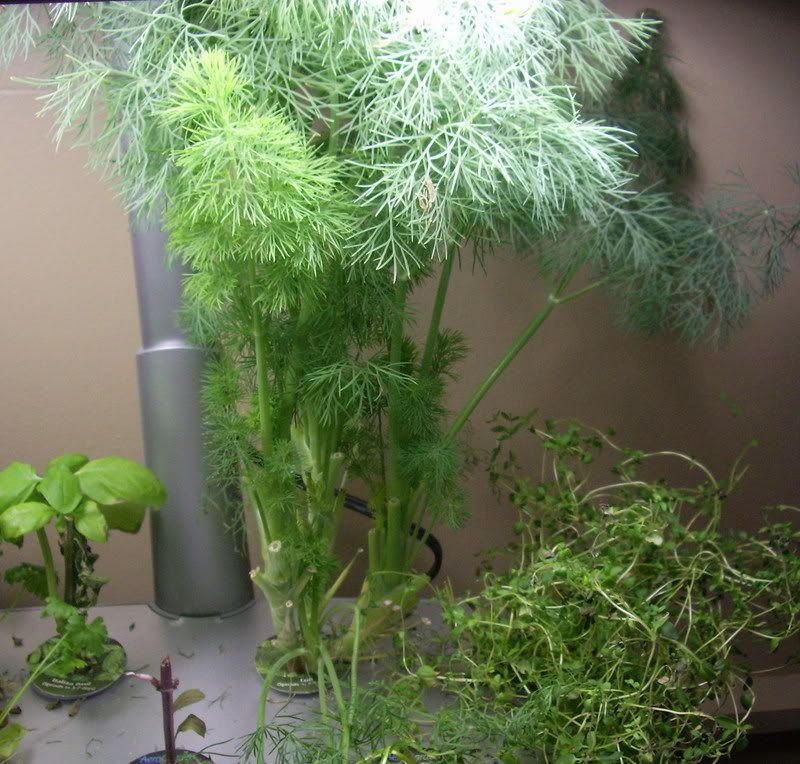
Two pitiful little leaves and a wilting stalk. My Italian basil is suffering the same blight. But, as you can see, the dill and thyme are doing extremely well. And, the parsley not doing too bad either. We use it more than I thought we would...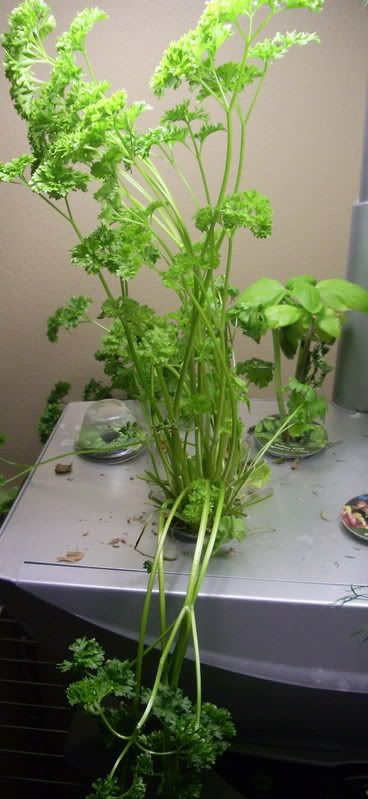
These are the chives...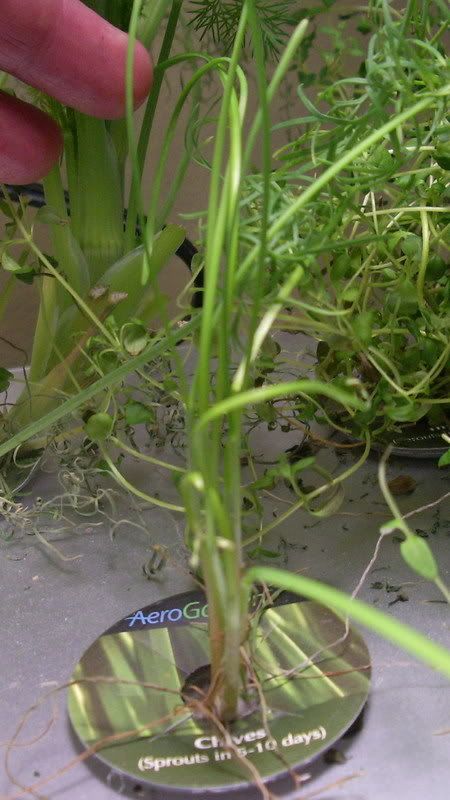
They never really took off like the other plants. They were always spindly and small, but I have cut them back a couple of times and I had enough to use the cut-offs for Roasted Red Pepper & Chive Aioli and for garnish. But, I was hoping for fat and vigorous chives to use often. Clearly, that is not going to happen.
The water in the tank looks disgusting, but it doesn't smell bad or anything. I'm still tempted to take it over to the sink and dump it out, run clear water through it all and wipe the sides, then replace it with fresh water and nutrients. It may help with the white fuzz problem, too, if I'm lucky. I'll let you know what I decide.
I have toyed with the idea of starting a whole new garden of herbs with my own seeds. A while back I removed the mint and thought I would replace it with basil, an herb I use far more often than mint. When I tried to separate the roots from the sponge, it just destroyed the sponge and rendered it completely unusable. I have since purchased a bag of 100 sponges from an Amazon.com retailer called AeroFalls. This retailer also sells a bag of nutrients that costs considerably less than AeroGarden. I'm going to try that, too.
Anyway, back to my original thought. I started new basil from seeds I had been saving from last spring. I was worried that they wouldn't germinate, but I checked this morning and although it's not yet peaking out of the sponge, one of the seeds is finally sprouting.
I'm not sure I'm doing this replanting thing in the best way. I think probably I should remove all the plants and start new from scratch. But, then, that would not be me...being as how I am one who constantly lives on the edge ;)

Saturday, February 28, 2009
AeroGarden - Update

Sunday, February 22, 2009
Casseroles = Comfort
Debbie over at The Friday Friends posted an entry about casseroles.
Now, while I love a simple Beef Wellington with Truffled Mushroom Sauce, or Grilled Salmon with Herbed Cream Sauce, or Veal Picatta, or Chicken Marsala, you could prepare a casserole for me for dinner and I'd be a happy camper.
Like Debbie, when I was growing up, my mom made lots of casseroles. I also prepared tons of casseroles when my kids were growing up. Casseroles were, and still are, fast, filling, tasty and cheap. Back in the day, I remember shopping for the week for only $25 or $35. Now, I can't walk out of the market without spending at least that for just a few items. But, that's another post.
Now what can you do with a little hamburger, a few potatoes and some cheese? How about Cheesy Shepherd's Pie...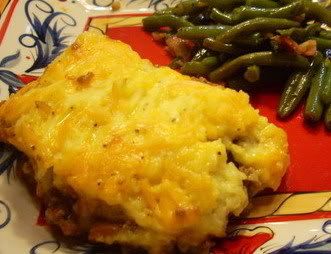
by Terri Powers for Terri's Table
2 pounds baking potatoes, peeled and thinly sliced
1 tablespoon oil
6 medium carrots, halved lengthwise and thinly sliced
6 celery stalks, thinly sliced
1 onion chopped
1/2 teaspoon dried thyme
2 tablespoons Worcestershire sauce
1/4 cup flour
1 can tomato paste
2 pounds ground beef
1 cup beef broth
1/2 cup cream
grated cheddar cheese (2 large handfuls into potatoes and 2 large handfuls for the top)
In a large saucepan, add potatoes and enough water to cover. Season generously with salt and pepper. Bring to a boil, reduce heat to a simmer and cook until potatoes are tender, about 12 to 18 minutes. Drain well and place back into the hot pot. Cook over low heat, stirring, until any excess liquid evaporates, about 1 minute. Remove from heat, add the cream and 2 large handfuls of grated cheddar cheese. Mash to desired consistency, season with salt and pepper and set aside.
Preheat oven to 450 degrees.
In a large Dutch oven, heat the oil over medium-high heat. Stir in the carrots, celery, onion and thyme and cook until the onion is translucent, about 8 to 10 minutes. Add the ground beef and cook, stirring until crumbled, until cooked through, about 6 to 8 minutes. Stir in Worcestershire sauce, flour and tomato paste. Cook, stirring, for about 1 minute. Add the beef broth and let simmer for about 1 minute. Add salt and pepper to taste.
Coat a 9 X 13 baking pan generously with cooking spray. Scoop the beef mixture into the baking pan and spread into an even layer. Drop dollops of the mashed potatoes all over the top of the beef mixture and gently spread evenly over the beef mixture. Sprinkle the top with 2 large handfuls of grated cheddar cheese.
Bake in preheated oven until the cheese on the potatoes is almost browned and the filling is hot, about 20 minutes. Remove from the oven and let cool slightly before serving.
Sunday, February 15, 2009
Chocolate Raspberry Panini
Although I peruse quite a few food blogs, I have my favorites because I know whatever those wonderful cooks share will be good.
Have you seen a recipe on a food blog and tried it and thought, How in the world could I have thought this would taste good AND why in the world did that blogger think it tasted good enough to share? I have. Too many times I've baked a cake or bread or main dish and wound up giving it away or throwing it away.
So I limit my tastings and testings to the few favorite tried and true bloggers I trust. Their most recent posts are on my sidebar and I encourage you to try any of the dishes they have to offer. You won't be disappointed.
Marie of Proud Italian Cook is absolutely one of my favorites and she has done it again! She made a Chocolate and Strawberry Panini and I couldn't wait to try it.
I have to admit, I didn't use the very best chocolate. I bought one large Hershey chocolate bar. And, of course, I couldn't find a pound cake ~ not in the bakery, not in the freezer ~ so I bought a box mix (yes, a box mix - so shoot me) and made my own. Instead of strawberries... because, of course, my market did not have any strawberries... I used fresh raspberries. Oh, and I don't have a panini maker either, but my sister, Karen, gave us a George Foreman grill for Christmas, so I used that.
Okay...I'm definitely not Marie!
So, I heated up the grill to about medium heat. I sliced the pound cake into about 1/2-inch slices. I placed the whole raspberries all over the surface of one slice of the pound cake, then placed three squares of the chocolate bar, evenly spaced, over the raspberries and topped it off with another slice of the pound cake.
I buttered both sides of the grill and placed the "sandwich" onto the grill and gently closed the lid and let it cook for about 2-1/2 to 3 minutes, until the pound cake was browned. I then removed the sandwich from the grill to a plate, cut it in half and sprinkled it with powdered sugar.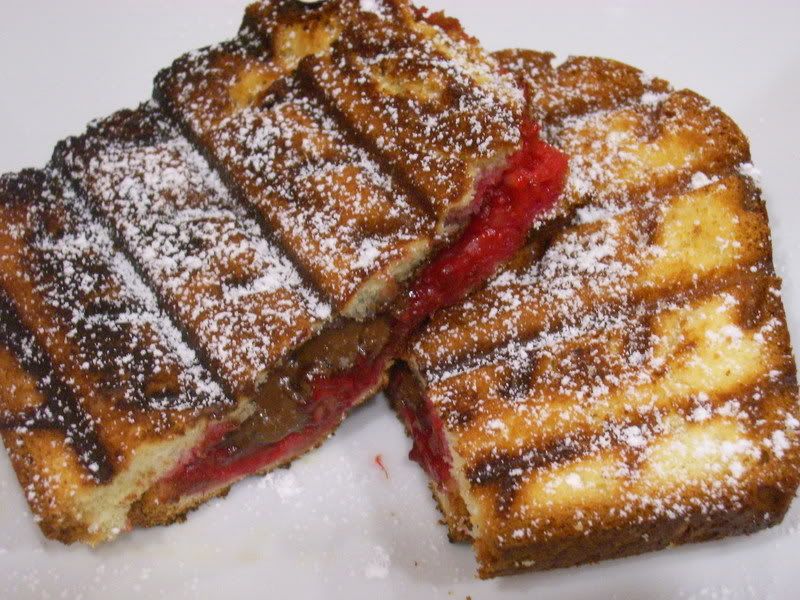
My thoughts ~
- I can't wait to make this for my grandkids. They would love it.
- I know why Marie used strawberries. They have more texture when they are briefly cooked or warmed. The raspberries I used sort of melted. Don't get me wrong, they were delicious, but just sort of mushy.
- When I do this again (and I WILL make this again), I will find some really good chocolate. It will be well worth the trouble, even if I have to go to Little Rock to find it.
- I would use more chocolate than I did this time. I was a little hesitant to use more because I didn't want it all to melt and leak outside the sandwich, but I should have used at least one more square.
- Tom had the idea of using peanut butter and chocolate. Ooooo baby, would that be like a Reese's Peanut Butter Cup?
- Or, I thought about trying sauteed apples and chocolate; or grilled pineapple, coconut and chocolate. The combinations are endless.
Try it and let me know what you think!
UPDATE: I tried this panini using sliced strawberries and Ghirardelli Espresso Chocolate bar! Oh...My...Gawd!! So yummy. And I love Alison's idea of using Nutella instead of chocolate. Or how about using bananas and coconut and Nutella? I am on a roll!
Saturday, February 14, 2009

Wednesday, February 11, 2009
"How can a society that exists on instant mashed potatoes, packaged cake mixes, frozen dinners, and instant cameras teach patience to its young? "
I would add "Fast Food" to Paul Sweeney's quote. But, that's not the real point of this post. Laziness is my point.
I've been lazy, neglectful, uninspired and even considered deleting my food blog altogether. I haven't posted much recently although I really have been cooking a lot and taking lots of photos. I have stacks of recipes that I've created, adapted or just copied from cookbooks and other blogs, but I haven't posted them. Why? I don't know really. Priorities change, life gets more complicated, time passes so quickly I hardly know what day it is, laziness...or maybe just a combination of all of the above.
Whatever it is, I need to wait until the weekend to get organized and catch my breath. Tomorrow is a long 10-hour work day for me and Friday I work in the morning and Tom and I have a couple of commitments in the afternoon. So, the weekend it must be.
Bottom line, I have decided to make the commitment continue my food blog regularly, even though my readership has declined because of sheer boredom. For that, I am very sorry. But, thank you to those of you who have hung in there waiting for the yummy post that never came. I promise I will do my best to make it more interesting and more yummy.
See you in a couple of days!
Wednesday, February 4, 2009
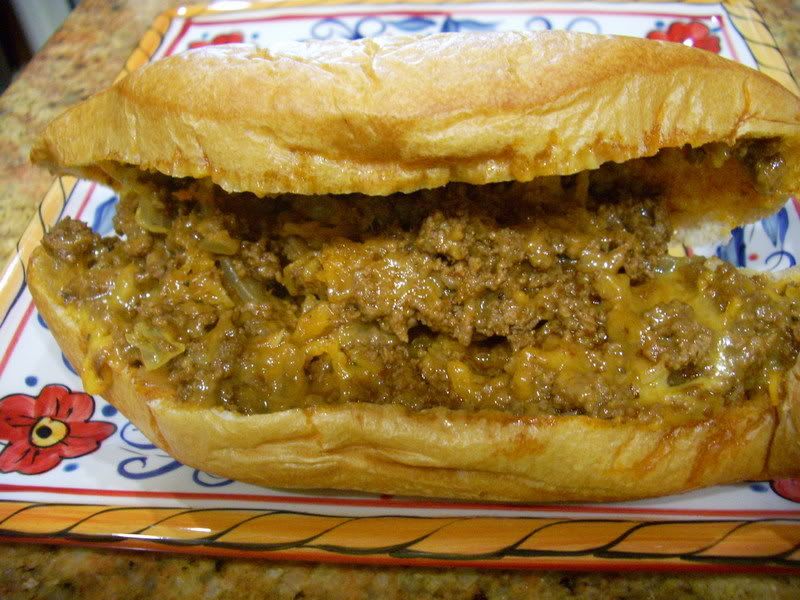
Ava's Stuffed Buns
In the late 1970's, my husband and I moved from the San Jose Bay Area to the north shore at Lake Tahoe in California. My husband worked for Placer County Sheriff's Department and our sons attended school at Kings Beach Elementary and North Tahoe Middle School. I worked at Truckee High School as the Registrar.
Truckee High School was small, about 500 or so students. I knew just about every student by name. The gathering place for breaks and lunch for students, teachers and staff alike was the school cafeteria, which was ruled with a jovial but iron hand by Ava Glenn.
When it came time to register for classes, "Kitchen Assistant" in Ava's kitchen was a coveted class, available to only a limited few juniors and seniors who would arrive to their "class" to clear tables, empty trash, wash industrial size pots, pans and trays and cut vegetables and meat and mix them with copious amounts of noodles and/or potatoes and sauces to create the casseroles that would be served as the day's lunches to anyone venturing into the cafeteria for nourishment.
Ava was everyone's Grandma. Her daily uniform was a house dress, apron and white nurse's shoes. She wore no makeup and her short, unruly hair was bright red with gray roots. She was always smiling. Ava called everyone by their given name and always added "honey," so my name was Terri Honey. Even our principal, Vince Honey, was subject to her familiarity, but he didn't seem to mind.
Ava was stronger than her stature would suggest. She easily slung huge pots of meat and gravy or trays piled high with sandwiches or vegetables from the stove or oven to the work-table, barking directions to her students, telling them what to do, how to do it and when to do it. And, even through the chaos of clanging dishes, silverware, pots and pans, and a cafeteria full of talking students, teachers and staff, every so often you would hear Ava break into a laugh, a high pitched bawdy cackle, and her laugh would pierce the noisy room as if she broke the sound barrier and the entire cafeteria would be eerily silent for a couple of seconds, then the noise would resume normally.
Ava's warmth and generosity extended beyond the school cafeteria. She would often prepare and donate her special Stuffed Buns for the Booster Club to sell at football and basketball games. I had one of the Stuffed Buns at a football game and I had to have the recipe. I've been making them ever since, although I have tweaked the recipe to some degree. I make at least a dozen or so at a time and what I don't use for dinner, I freeze for another time.
adapted from Ava's recipe by Terri Powers for Terri's Table
2 lbs. ground beef
1 large onion, diced
3 Tablespoons tomato paste
2 Tablespoons chili powder
1 Tablespoon ground cumin
1 Tablespoon smoked paprika
2 teaspoons salt
3 teaspoons pepper
3 to 4 cups cheddar cheese (I use nearly all of a 1 lb. bag of grated sharp cheddar)
14 to 16 large unsliced buns or rolls
In a large frying pan, brown the ground beef until it is cooked through. Add the onion and cook on medium heat until the onion is transparent. Add the tomato paste, chili powder, cumin, smoked paprika, salt and pepper and stir well over medium heat until combined well. Remove the meat mixture from the heat and allow cool slightly.
While meat mixture is cooling, prepare your aluminum foil sheets, one sheet to wrap each bun. The sheets should be about a 12-inch X 12-inch square.
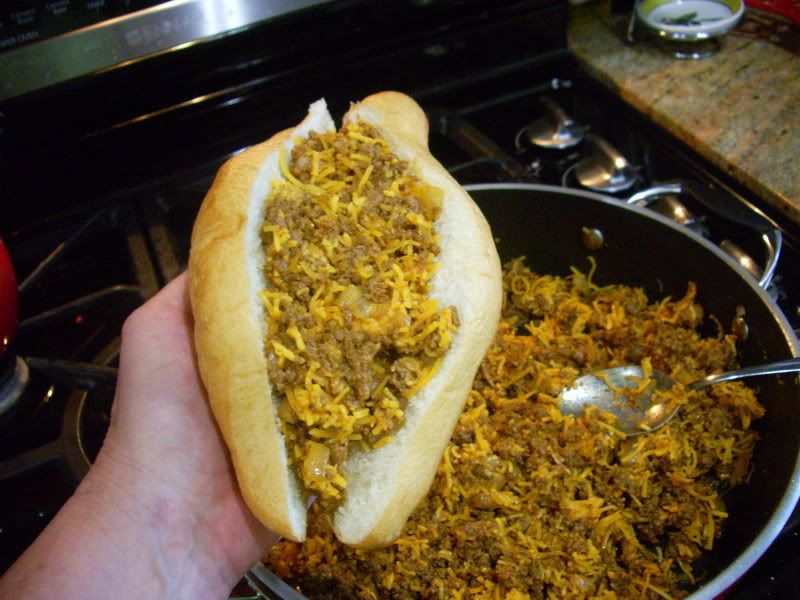
Sprinkle the cheese over the meat mixture and stir well.
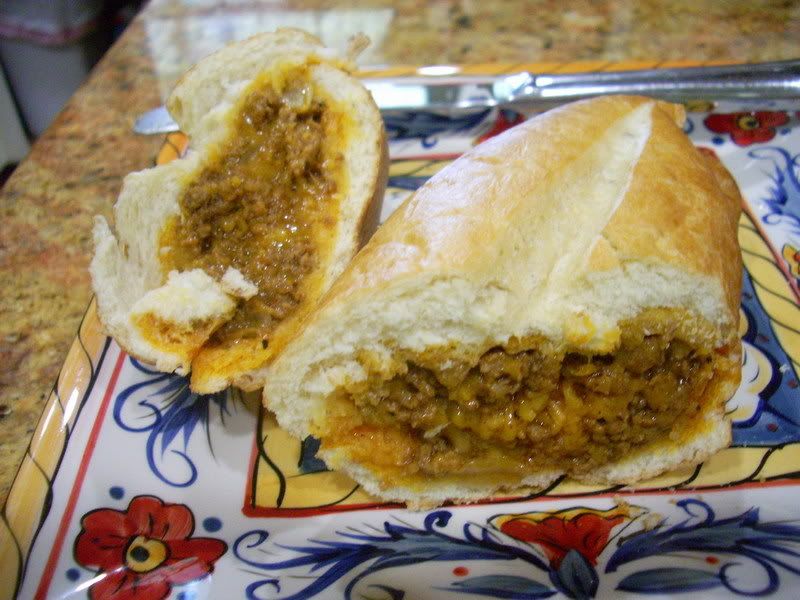
To fill the buns, cut each one almost all the way through, but leaving it still attached (like a hot dog bun). Spoon the mixture generously into the bun, pressing the mixture into the bun with the spoon.
Place the stuffed bun on a foil sheet and press down gently to close with your hand. If the meat starts to push out of the sides, use a spoon to hold it in place while you press.
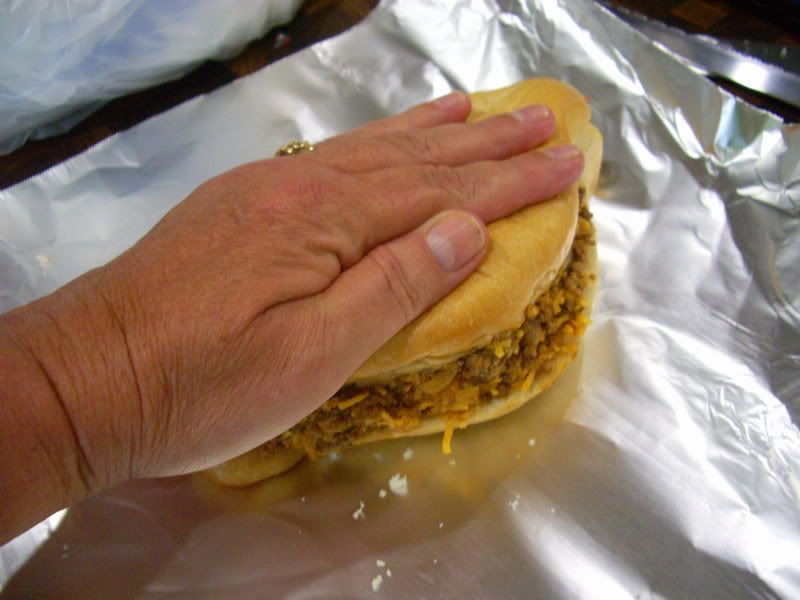
Wrapped each stuffed bun tightly in foil.
Preheat the oven to 325º. Place the buns on a cookie sheet and bake for 12 to 15 minutes. They should be hot all the way through and the cheese should be melted.
These babies freeze very well. I throw them in a large zip lock bag just to keep them from getting lost in the freezer. When we want them for lunch, dinner or snack, we just pop them frozen into a 325º oven for 20 to 25 minutes.
I think Ava would be proud.
Subscribe to:
Posts (Atom)